Zucchini Breadsticks Recipe for Kids
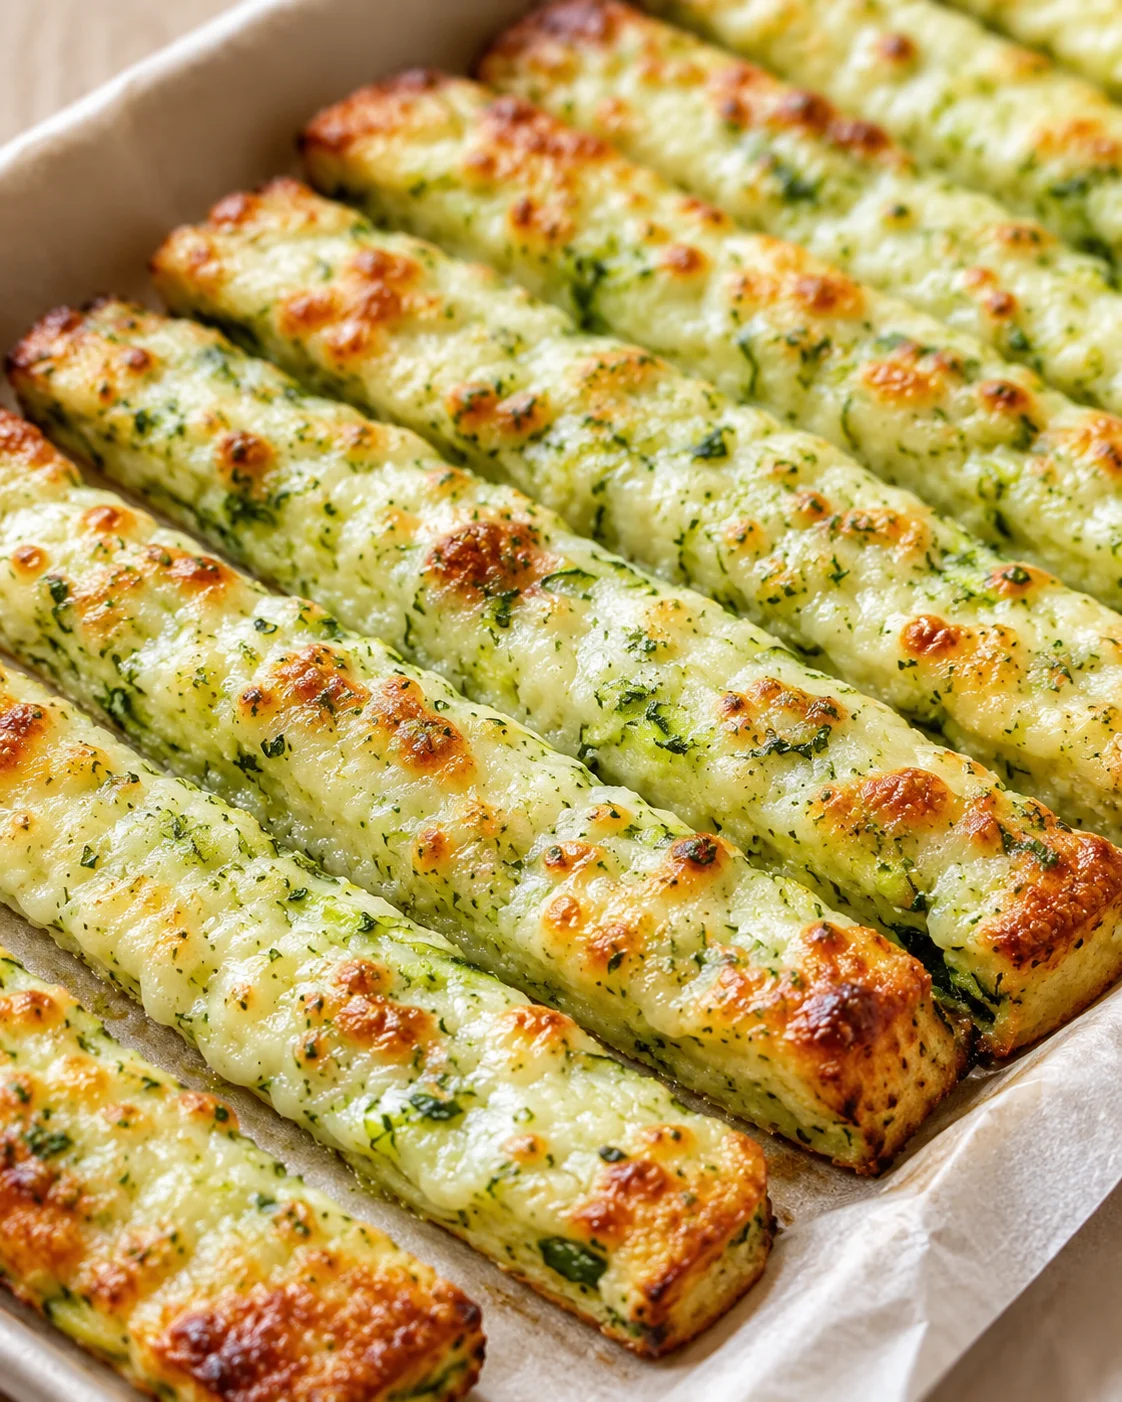
These Easy Zucchini Breadsticks are such a delicious way to sneak some veggies into snack time! They come out soft, cheesy, and perfect for dipping in your favorite sauce. Plus, they’re just the right size for little hands to enjoy.
I have so much fun making these with my kids — they love mixing the dough and shaping the breadsticks. It’s also a fantastic way to use up all that extra zucchini from the garden. Honestly, who knew veggies could turn into such a tasty treat?
These Easy Zucchini Breadsticks are a fantastic, kid-approved snack that’s packed with veggies and ready in a flash. They bake up soft, cheesy, and just begging to be dipped. It’s a simple, tasty way to use any extra zucchini hanging out in your fridge or garden, and a fun hands-on project for the whole family.
This recipe is straightforward: you’ll need about one medium zucchini (that’s roughly 1 cup grated), a handful of pantry staples, and two kinds of cheese to bring in that melty goodness. I’ve laid out every step clearly, along with prep and bake times — around 10 minutes prep and 15–18 minutes in the oven, so about 30–35 minutes total. You’ll also find swaps if anyone needs gluten-free or egg-free options, tips to keep the texture perfect (no sogginess here!), and ideas for serving, storing, and reheating. Plus, I’m answering your most common questions to make this even easier.
Scroll down when you’re ready to jump into the recipe and the step-by-step photos that’ll guide you through making these zucchini breadsticks at home with your kids or for a quick snack fix.
Why Kids and Parents Love It
These zucchini breadsticks are a total win for busy families. They come together quickly — about 30–35 minutes — and use simple ingredients you probably already have. The best part? They hide a serving of veggies inside a cheesy, hand-held treat that kids absolutely love. The dough is easy for little ones to help mix and shape, the sticks bake up soft with a nice golden crust, and they’re perfect for dipping in anything from marinara to ranch, making snack time fun and wholesome. If your crew loves dippable snacks, consider Baked Crispy Parmesan Ravioli as another easy, kid-friendly option. Plus, they’re flexible — you can swap ingredients based on what you have or dietary needs, and they’re perfect for using up that extra zucchini from your garden. For a quick dinner that also uses up zucchini, try this Ground Chicken Zucchini Rice Skillet.
What You’ll Need and Swaps
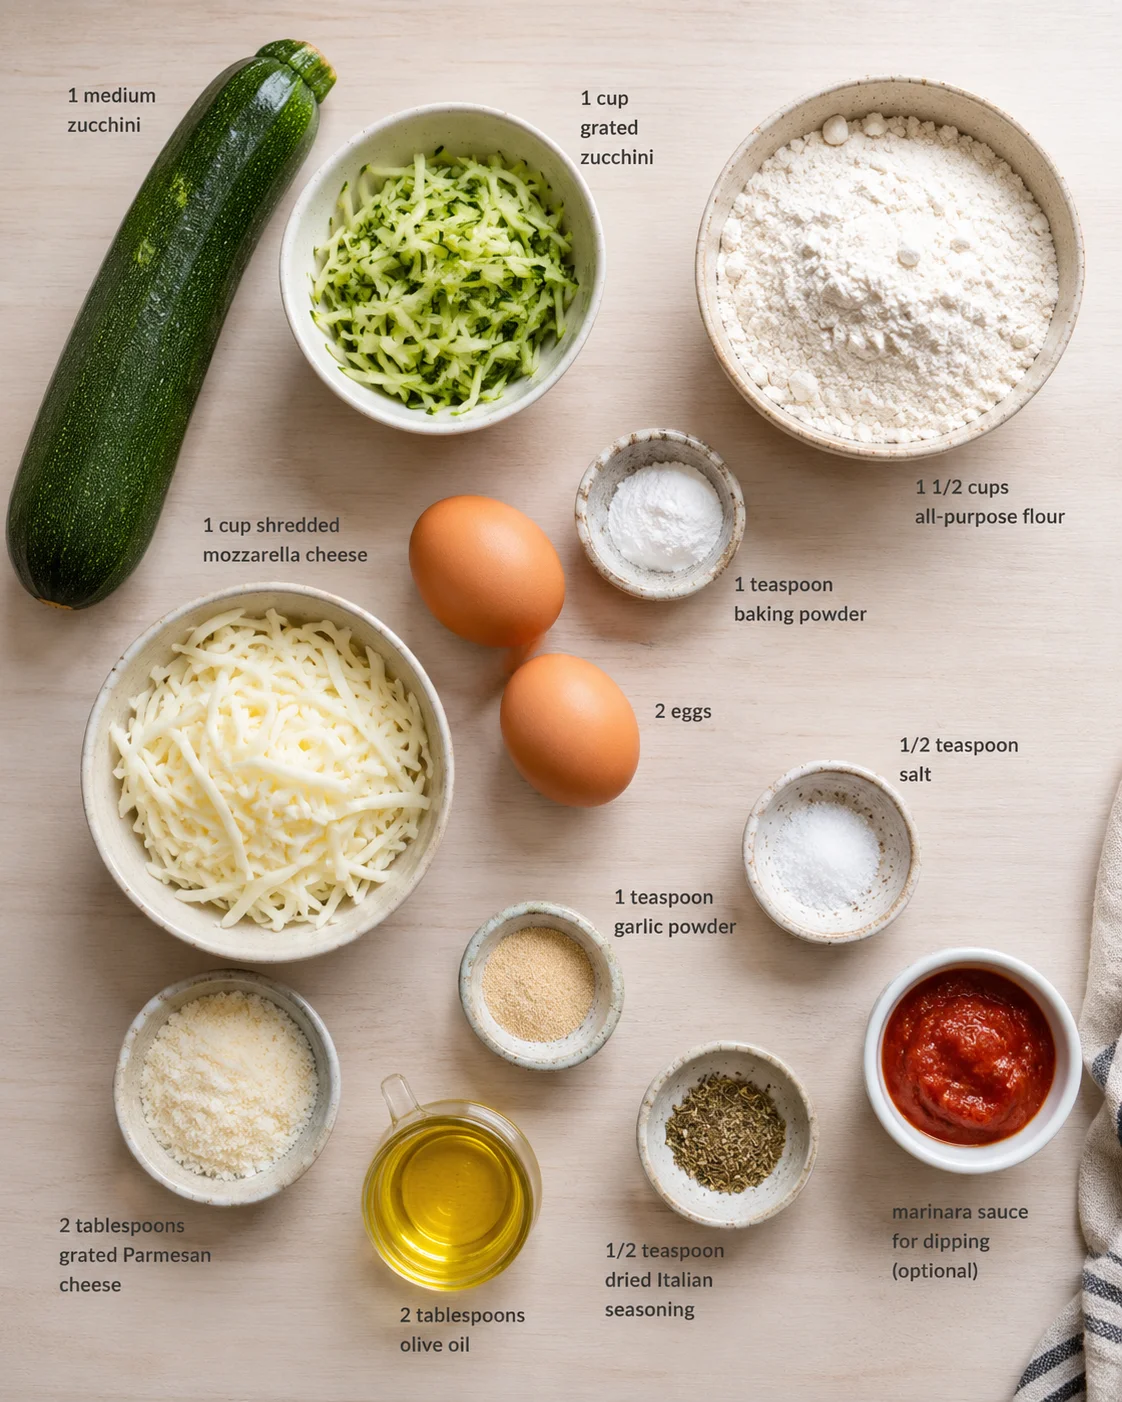
- 1 medium zucchini (about 1 cup grated)
- 1 ½ cups all-purpose flour
- 1 teaspoon baking powder
- ½ teaspoon salt
- 1 teaspoon garlic powder
- 1 cup shredded mozzarella cheese
- 2 tablespoons grated Parmesan cheese
- 2 eggs
- 2 tablespoons olive oil
- ½ teaspoon dried Italian seasoning (optional)
- Marinara sauce for dipping (optional)
How to Mix, Shape, and Bake
- Preheat oven to 400°F (200°C) and line a baking sheet with parchment paper.
- Grate 1 medium zucchini using a box grater or food processor.
-
Wrap the grated zucchini in a clean kitchen towel or cheesecloth and squeeze out as much moisture as possible.
- In a large bowl, combine 1½ cups all-purpose flour, 1 teaspoon baking powder, ½ teaspoon salt, and 1 teaspoon garlic powder.
- Add the drained zucchini, 1 cup shredded mozzarella, 2 tablespoons grated Parmesan, 2 eggs, 2 tablespoons olive oil, and ½ teaspoon dried Italian seasoning (optional) to the dry ingredients and stir until incorporated.
- Lightly flour a clean surface, turn out the dough, and knead briefly until it pulls together.
- Roll or pat the dough into a rectangle about ½ inch thick.
- Use a knife or pizza cutter to slice the rectangle into strips about ½ to ¾ inch wide.
- Transfer the strips to the lined baking sheet, spacing them apart.
- Optional: brush the strips with olive oil and sprinkle with extra Parmesan or desired toppings.
- Bake for 15–18 minutes, or until the breadsticks are golden and cooked through.
- Let the breadsticks cool for a few minutes on the baking sheet before serving.
Keep Them from Getting Soggy
The secret to zucchini breadsticks that aren’t soggy is getting rid of as much moisture as possible from the zucchini. Grating it is just the first step — and squeezing is the same trick that keeps a quick, healthy ground turkey zucchini casserole from getting watery.
- After grating, wrap the zucchini tightly in a clean towel or cheesecloth and squeeze hard to remove every bit of moisture you can.
- Then, when mixing your dough, combine the wet and dry ingredients until just mixed to keep that perfect texture — avoid overmixing.
- Make sure your oven is fully preheated; a hot oven helps create a crispy crust and cooks the breadsticks evenly (the same high-heat approach that makes crispy baked cod that’s perfectly golden and flaky).
Following these tips will give you zucchini breadsticks with that perfect balance of soft inside and a little crust outside — kids won’t be able to stop munching on them!
Flavor Swaps and Dietary Options
- Cheese swaps: Try cheddar or Monterey Jack instead of mozzarella for a twist on flavor; feel free to bump up the Parmesan for a sharper taste.
- Veggie swaps: If you’re out of zucchini, grated carrots or yellow squash are great alternatives.
- Make it gluten-free: Use a gluten-free all-purpose flour blend with xanthan gum for best results, or try this Parmesan herb keto bread for a low-carb, grain-free option.
- Egg-free option: Replace eggs with flax “eggs” (mix 1 tbsp flaxseed meal with 2.5 tbsp water per egg) as described earlier.
- Flavor add-ins: Mix in 1–2 tablespoons of fresh chopped herbs like basil, parsley, or chives, or sprinkle in some cooked crumbled bacon or extra Italian seasoning for a flavor boost.
- Shape changes: Instead of sticks, try shaping the dough into bite-sized nuggets, knots, or rounds to make fun party snacks or lunches.
- Toppings: Brush with olive oil and sprinkle with extra Parmesan, sesame seeds, or everything bagel seasoning before baking for an extra crunch.
Store, Reheat, and Make Ahead
To keep your cooked zucchini breadsticks fresh, store them in an airtight container in the fridge for up to 3 days. I recommend layering parchment paper between them so they don’t stick together.
When you’re ready to eat, reheat in a 350°F (175°C) oven or toaster oven for about 5–10 minutes to help them stay crisp—the same method I use in our baked ravioli recipe to keep them crunchy. The microwave works if you need a quick fix, but the breadsticks might lose some of their crunchy outside.
If you want to get ahead, you can prepare the dough and cut the strips, then cover and refrigerate them for up to 24 hours before baking. You can also bake them ahead and keep the cooked breadsticks refrigerated for 3 days.
Freezing works great, too! After baking, let them cool completely, wrap tightly in plastic wrap or freeze in a bag layered with parchment paper to avoid sticking. Freeze up to 1 month. When you want to eat, thaw overnight in the fridge and reheat in the oven for about 8–12 minutes at 350°F.
Common Questions and Answers
Can I Use Frozen Zucchini for This Recipe?
Yes, you can! Just be sure to thaw it completely and drain well before using. Give it a good squeeze to get out all the water, just like you would with fresh zucchini, to keep your breadsticks from getting soggy.
How Can I Make This Recipe Gluten-Free?
Swap the all-purpose flour for a gluten-free all-purpose flour blend that includes xanthan gum for the best texture. Keep the rest of the recipe the same for a gluten-free batch everyone will love!
Can I Make These Breadsticks Ahead of Time?
Definitely! You can mix the dough and cut the breadsticks, then keep them covered in the fridge for up to 24 hours before baking. Or, bake them ahead of time and store in an airtight container in the fridge for up to 3 days. Both ways work great to save you time later. For another make-ahead bake that reheats well, try our Mushroom and Spinach Lasagna.
What’s the Best Way to Store Leftovers?
Place leftovers in an airtight container in the refrigerator for up to 3 days. To reheat, pop them in a 350°F (175°C) oven for 5–10 minutes or microwave if you’re in a hurry (just know the microwave might make them a bit softer).
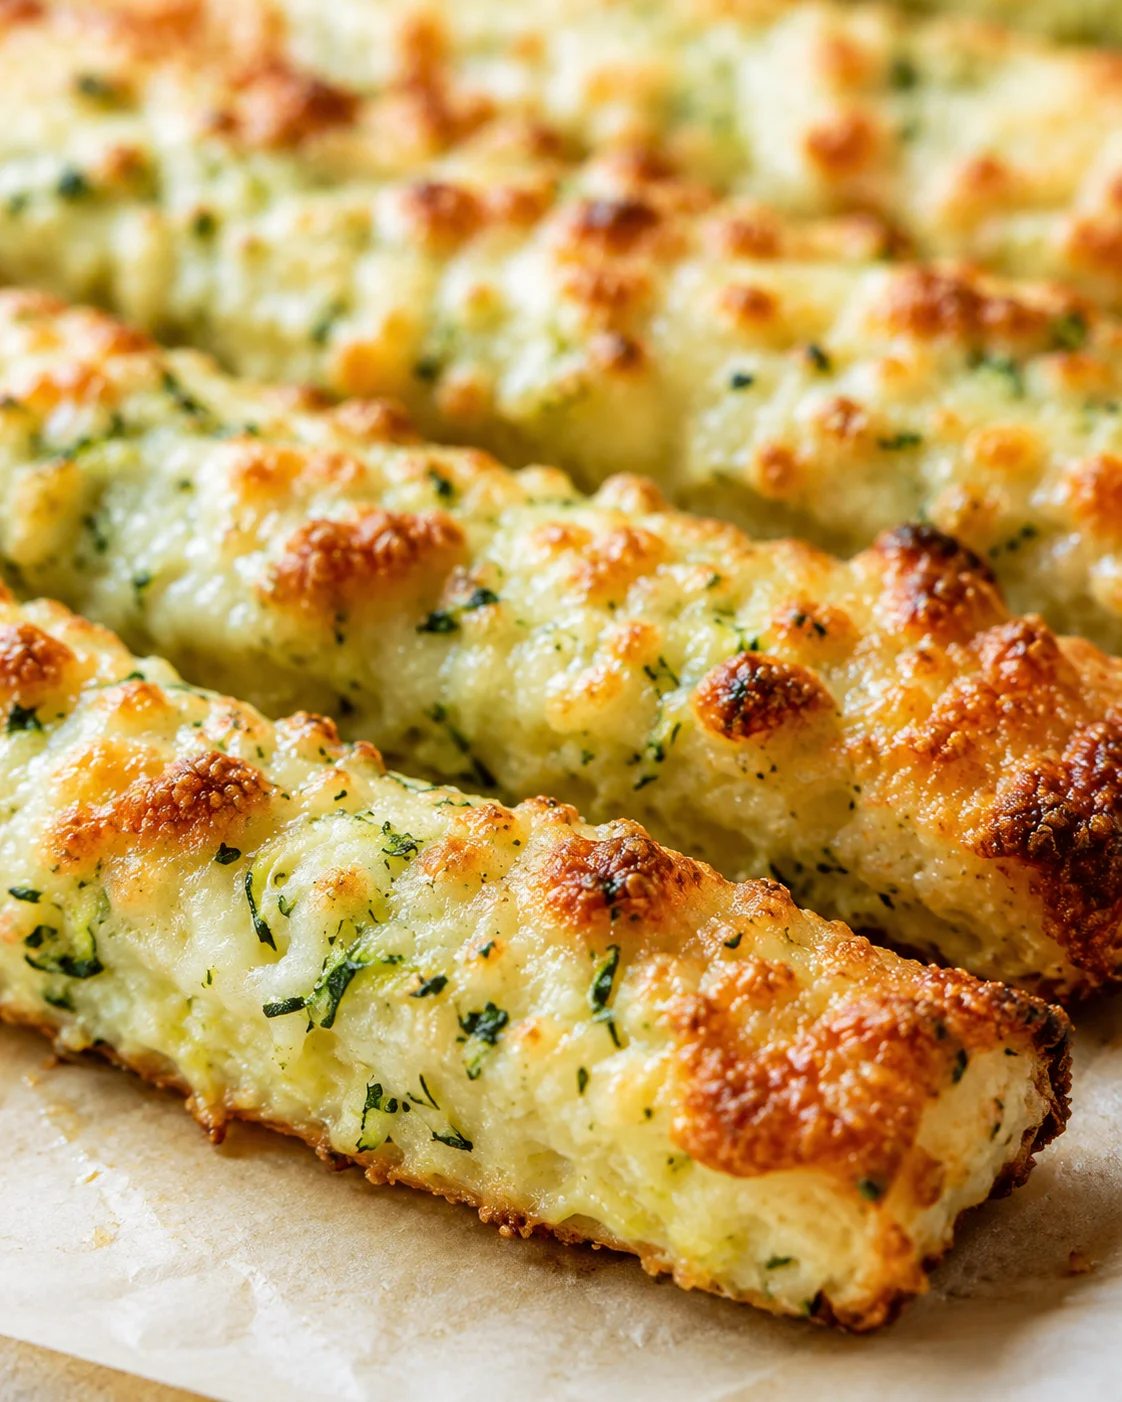
Soft and cheesy zucchini breadsticks that are kid-friendly and perfect for snacking or dipping in marinara sauce. Made with grated zucchini, mozzarella, and Parmesan cheese, with simple pantry staples.
- Prep Time: 10 minutes
- Cook Time: 15-18 minutes
- Total Time: 30-35 minutes
- Yield: Approximately 12-16 breadsticks 1x
- Category: Snack
Ingredients
- 1 medium zucchini (about 1 cup grated)
- 1 ½ cups all-purpose flour
- 1 teaspoon baking powder
- ½ teaspoon salt
- 1 teaspoon garlic powder
- 1 cup shredded mozzarella cheese
- 2 tablespoons grated Parmesan cheese
- 2 eggs
- 2 tablespoons olive oil
- ½ teaspoon dried Italian seasoning (optional)
- Marinara sauce for dipping (optional)
Instructions
- Preheat oven to 400°F (200°C) and line a baking sheet with parchment paper.
- Grate 1 medium zucchini using a box grater or food processor.
- Wrap the grated zucchini in a clean kitchen towel or cheesecloth and squeeze out as much moisture as possible.
- In a large bowl, combine 1½ cups all-purpose flour, 1 teaspoon baking powder, ½ teaspoon salt, and 1 teaspoon garlic powder.
- Add the drained zucchini, 1 cup shredded mozzarella, 2 tablespoons grated Parmesan, 2 eggs, 2 tablespoons olive oil, and ½ teaspoon dried Italian seasoning (optional) to the dry ingredients and stir until incorporated.
- Lightly flour a clean surface, turn out the dough, and knead briefly until it pulls together.
- Roll or pat the dough into a rectangle about ½ inch thick.
- Use a knife or pizza cutter to slice the rectangle into strips about ½ to ¾ inch wide.
- Transfer the strips to the lined baking sheet, spacing them apart.
- Optional: brush the strips with olive oil and sprinkle with extra Parmesan or desired toppings.
- Bake for 15–18 minutes, or until the breadsticks are golden and cooked through.
- Let the breadsticks cool for a few minutes on the baking sheet before serving.
Notes
To prevent sogginess, make sure to squeeze out as much moisture as possible from the grated zucchini., Avoid overmixing the dough to keep the texture perfect., Use a fully preheated oven to achieve a crispy crust., Cheese alternatives include cheddar or Monterey Jack., Gluten-free option: Substitute all-purpose flour with gluten-free flour blend containing xanthan gum., Egg-free option: Replace eggs with flax eggs (1 tbsp flaxseed meal mixed with 2.5 tbsp water per egg)., Vegetable substitutes: grated carrots or yellow squash., Enhance flavor with fresh herbs, crumbled bacon, or extra Italian seasoning., Shape dough into nuggets, knots, or rounds for variety., Store baked breadsticks in an airtight container in the refrigerator up to 3 days., Reheat in a 350°F oven for 5–10 minutes to keep crisp., Can freeze baked breadsticks up to 1 month; thaw overnight and reheat before serving.
Nutrition
- Serving Size: 1 breadstick
- Calories: Approximately 120 calories per breadstick
- Fat: About 5 grams per breadstick
- Carbohydrates: Approximately 15 grams per breadstick
- Protein: About 5 grams per breadstick