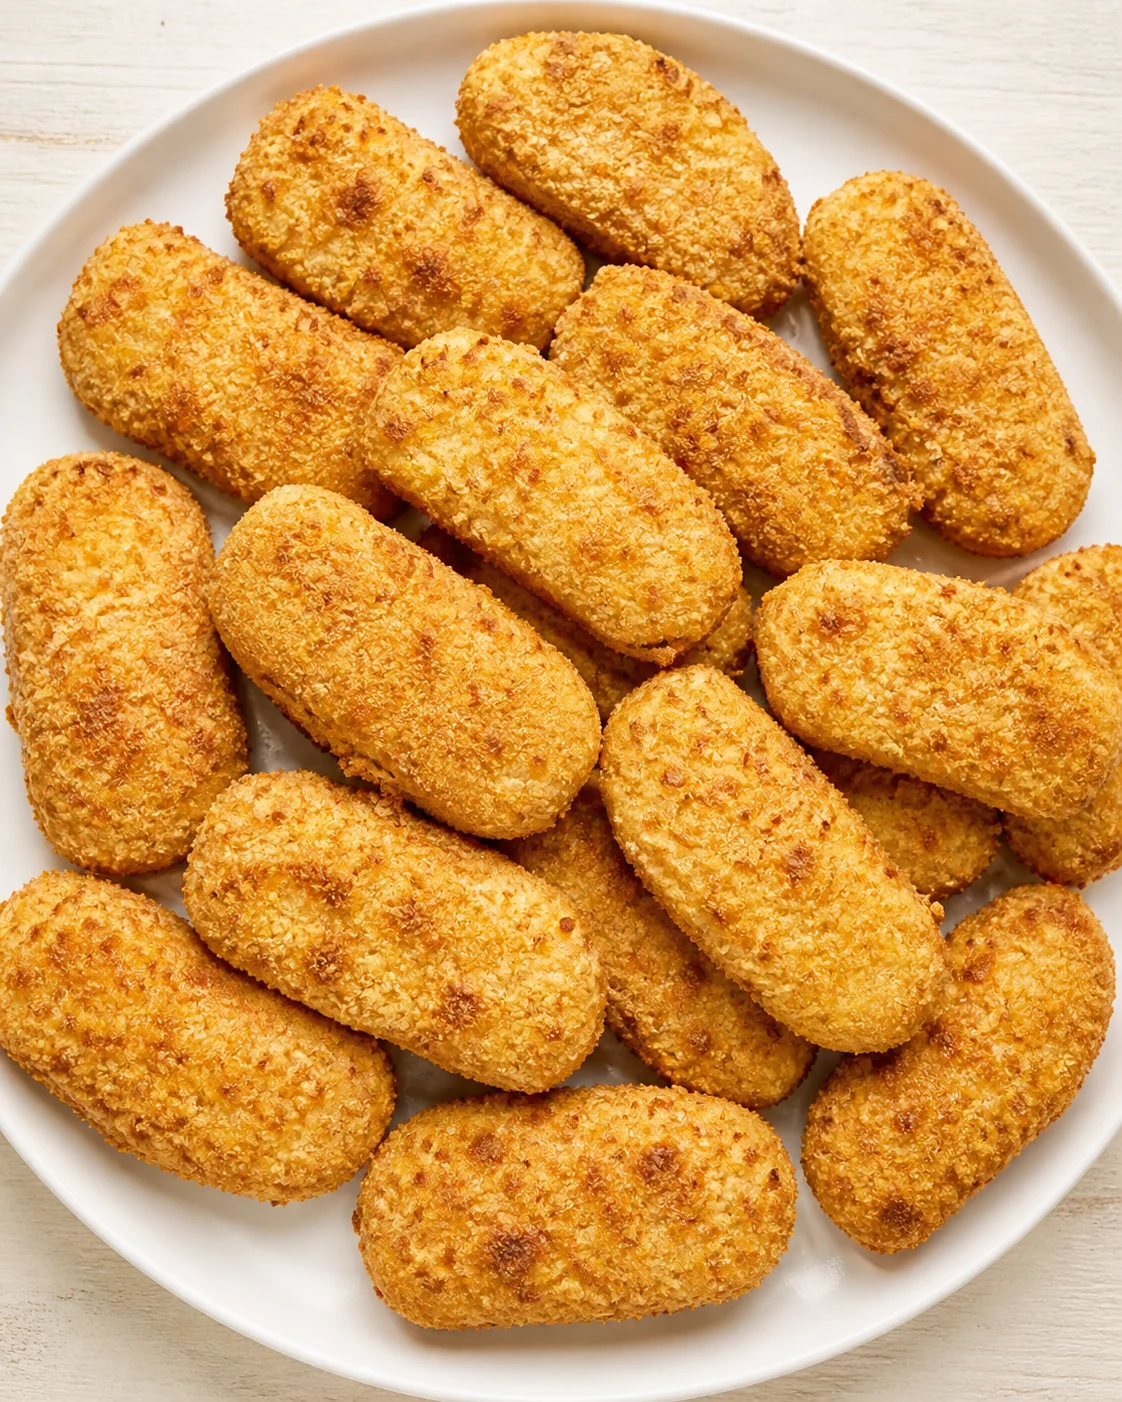
Baked Canned Tuna Fish Sticks
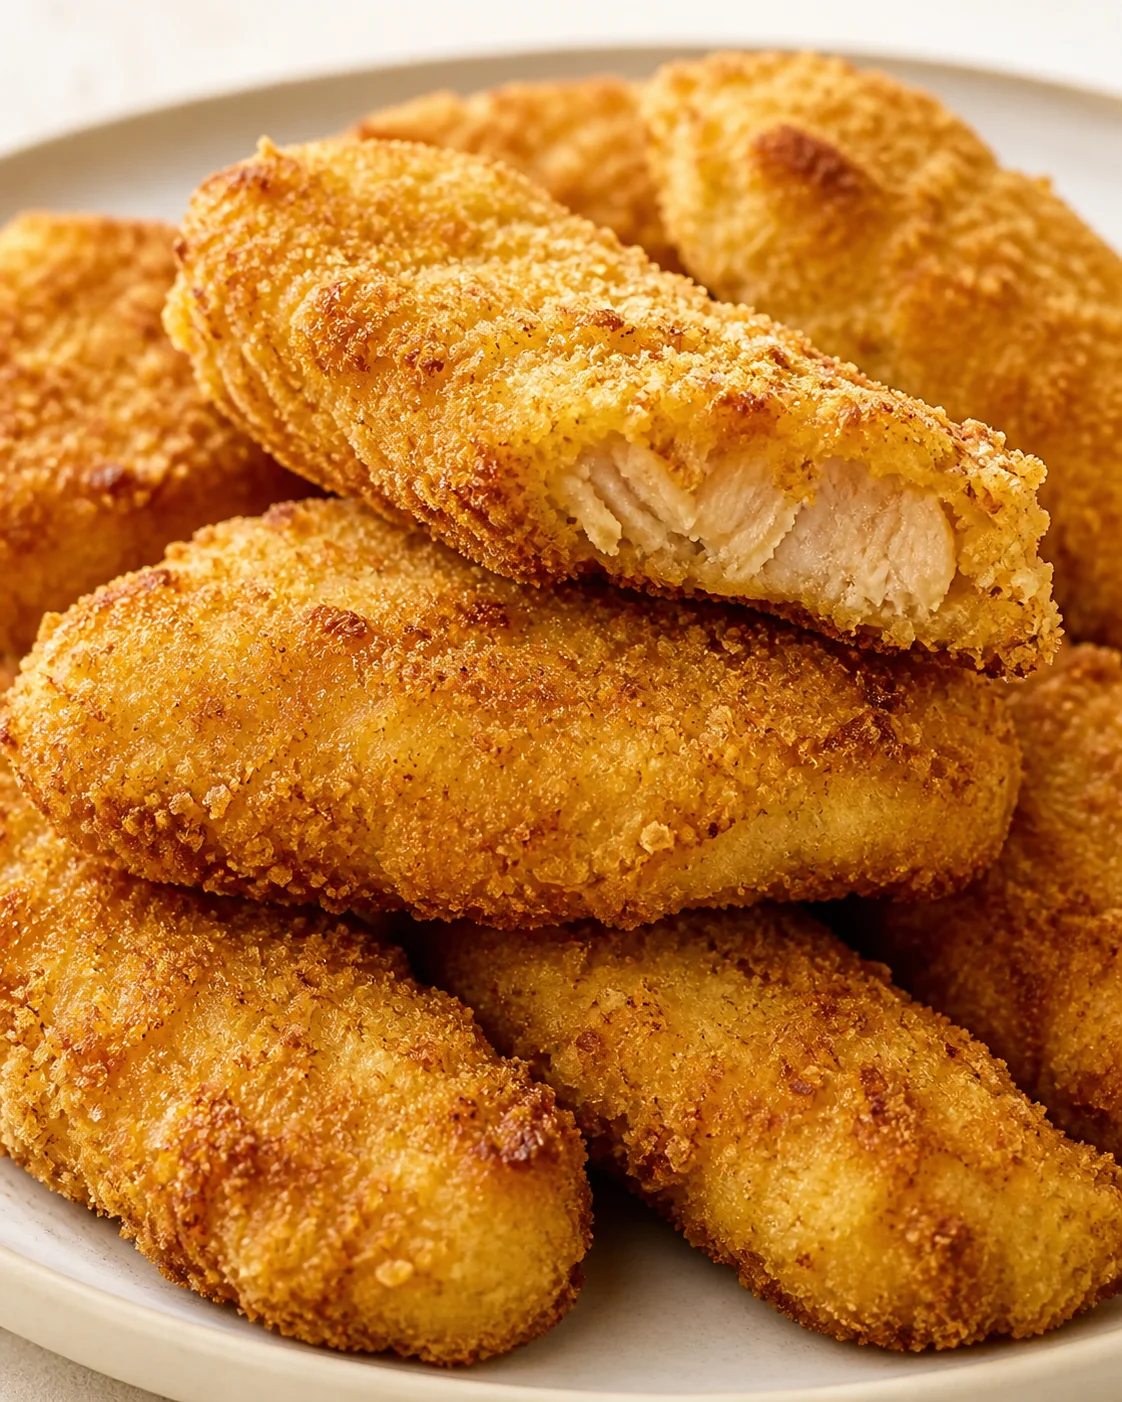
These baked canned tuna fish sticks take simple pantry staples and turn them into a kid-approved, budget-friendly dinner that’s ready in about 30 minutes. We mix well-drained canned tuna with shredded cheddar, an egg to bind it all, and crushed pork rinds for that crunchy, low-carb coating. The result? Crispy, cheesy sticks that hold up well and reheat beautifully. Below, I’ve shared ingredient tips and easy swaps, common pitfalls to watch out for, step-by-step instructions to shape and bake perfectly golden sticks, plus handy storage and reheating advice so you can prep ahead on busy nights. Serve them warm with favorite dips like tartar sauce, ranch, or spicy mayo for a hassle-free family meal everyone will love.
Pressed for time, dealing with picky eaters, or just want to use what’s in your pantry? These baked canned tuna fish sticks are just the ticket for an easy, budget-friendly meal that delivers crispy, cheesy bites in about half an hour. We start with well-drained canned tuna mixed with shredded cheddar, an egg to hold it together, and crushed pork rinds for a crunchy, low-carb crust. Shelf-stable ingredients come together to make a family-friendly dinner that reheats great and pairs perfectly with a variety of dips.
Below, you’ll find everything you need for consistent, crave-worthy results:
- Helpful ingredient notes and smart substitution ideas (for tuna, cheese, coatings, and binders).
- Step-by-step directions for mixing, shaping, and baking so your sticks stay together and turn a lovely golden brown.
- Common mistakes to avoid—especially dealing with extra moisture—and clever tricks for extra crispiness.
- Tips for storing, freezing, and reheating, so you can make these ahead for those hectic weeknights.
Keep reading and you’ll be ready to whip up a few simple pantry staples into a kid-friendly, low-carb dinner that shines with tartar sauce, ranch, or spicy mayo.
Why This Recipe Works
- Keto-friendly and low-carb – Swapping traditional breadcrumbs for crushed pork rinds keeps the carb count low, making these fish sticks a solid pick for keto or low-carb diets.
- Wallet-friendly protein – Canned tuna delivers affordable, high-quality protein, turning these fish sticks into an easy dinner that doesn’t break the bank.
- Speedy to prepare – You can have these on the table in just 30 minutes, perfect for those rushed weeknights when time is tight. For another quick option, try high-protein cottage cheese tuna cakes ready in 30 minutes.
- Flavor flexibility – Change up the seasonings or try different tuna varieties to match your family’s taste buds or what’s in your pantry. For a citrusy twist, try lemon-garlic tuna cakes.
Ingredient Checklist
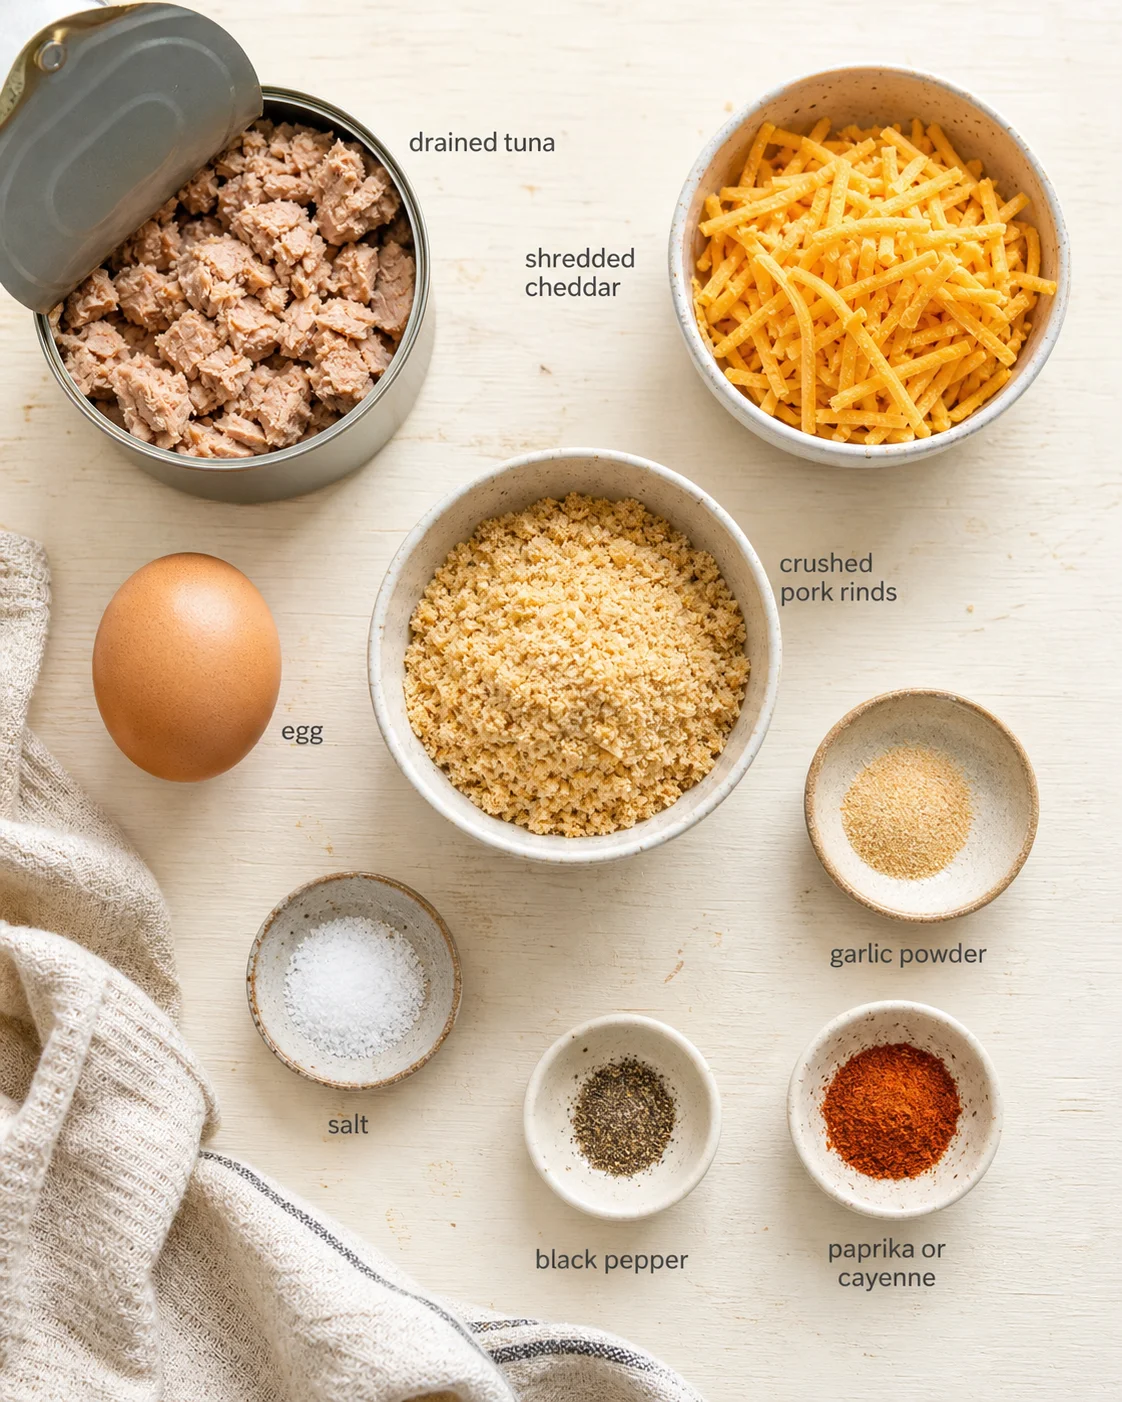
- 1 can tuna (make sure it’s drained very well to avoid soggy sticks)
- 1 cup shredded cheddar cheese (I’m a fan of Tillamook shredded sharp cheddar for that punch of flavor)
- garlic powder, to taste
- 1 large egg
- salt, to taste
- pork rinds, crushed (about 1/2 cup, crushed finely to mimic breadcrumbs)
- black pepper, to taste (freshly ground lends the best flavor)
- paprika or cayenne pepper, to taste
Shaping and Baking Instructions
- Preheat the oven to 400°F (200°C).
- Drain the canned tuna very well and pat dry with paper towels.
- Crush pork rinds finely to a breadcrumb-like consistency.
- In a mixing bowl combine the drained tuna, shredded cheddar, large egg, crushed pork rinds, garlic powder, salt, black pepper, and paprika or cayenne.
- Mix until a sticky mixture forms that holds together.
- Chill the mixture in the refrigerator for at least 15 minutes.
- Shape the chilled mixture into uniform sticks with your hands.
-
Line a baking sheet with parchment paper and arrange the sticks spaced evenly so they don’t touch.
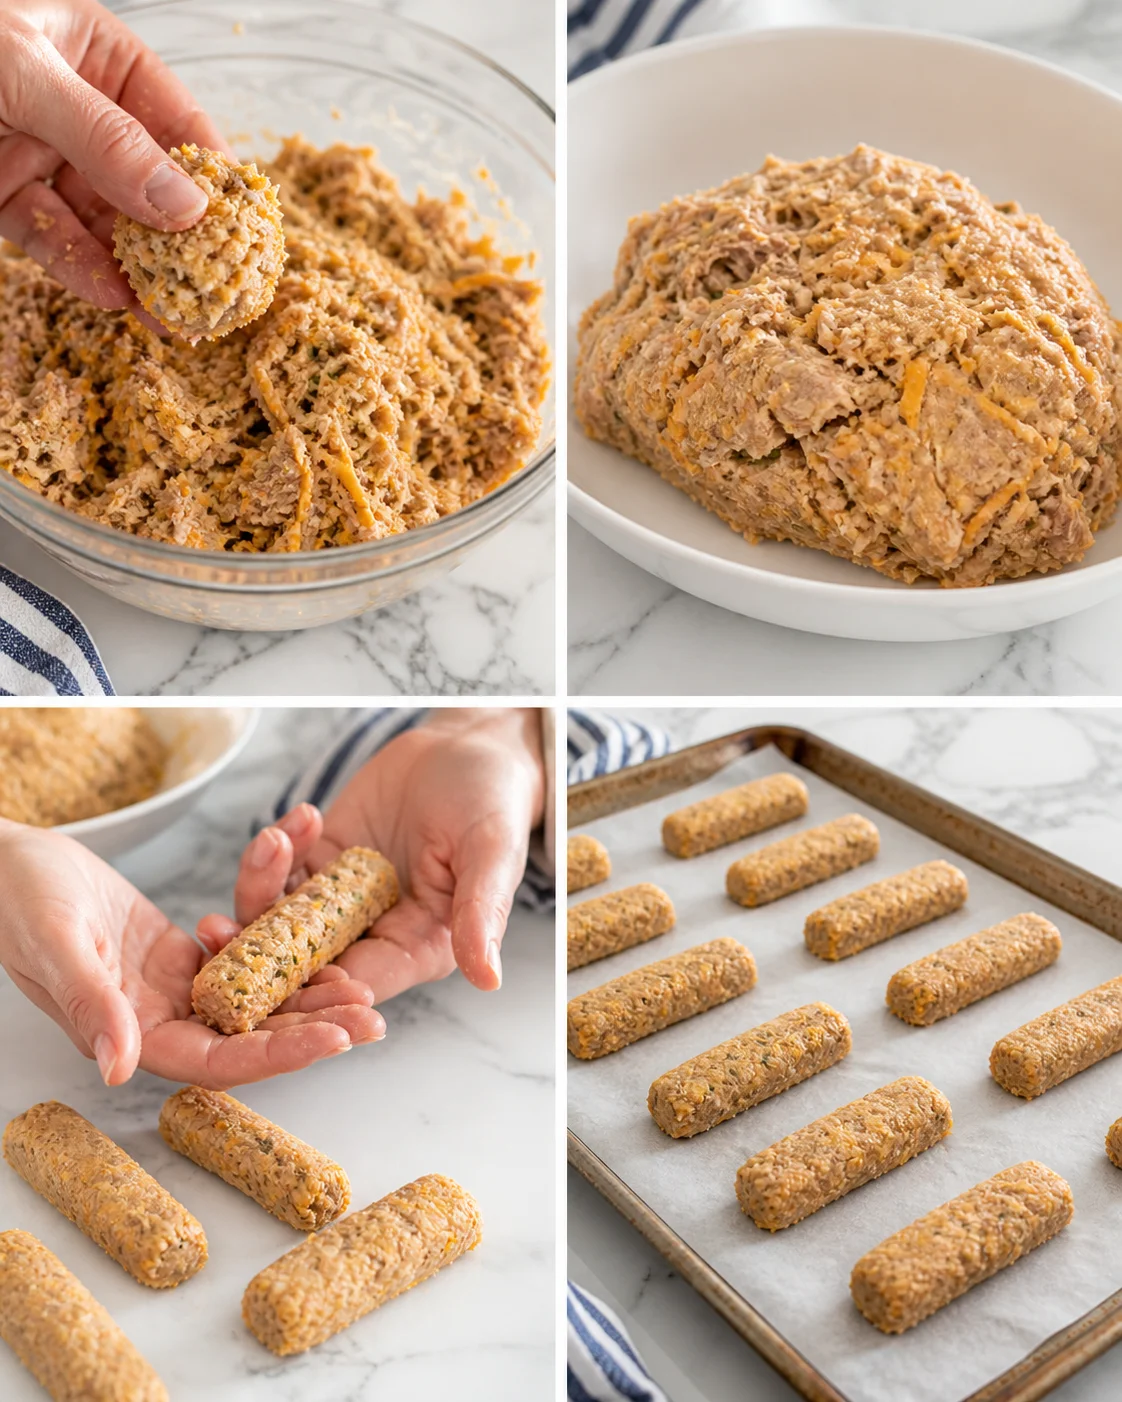
- Bake at 400°F for about 20 minutes, until golden brown and firm when gently pressed.
- Remove from the oven and let the sticks rest for a few minutes to set.
Troubleshooting and Serving Tips
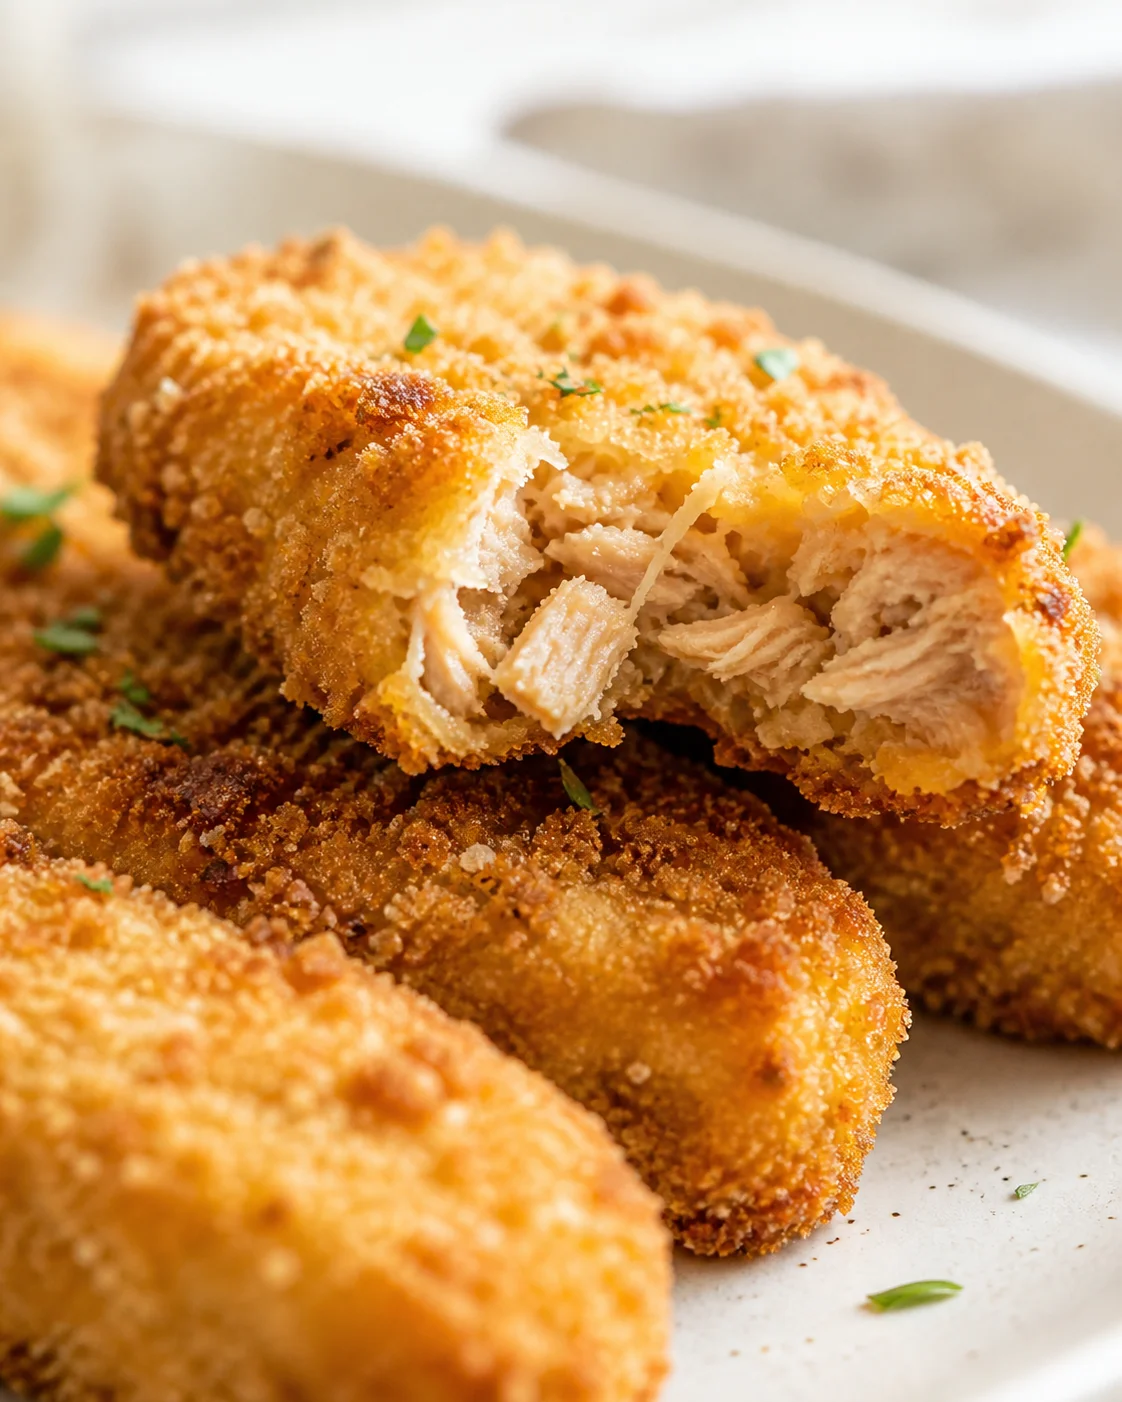
The biggest snag folks hit making tuna fish sticks is moisture. Make sure you drain your tuna thoroughly and pat it dry with paper towels. Otherwise, your sticks can go all mushy and fall apart while baking.
Texture depends heavily on your binder, so stick the mixture in the fridge for at least 15 minutes before shaping. This chills the cheese and egg mixture, making your sticks easier to form and less crumbly.
Watch your cooking temperature, too. If your oven or pan’s too hot, the outside will burn before the inside cooks through. Keep heat moderate and handle them gently—flipping with a flat spatula helps keep sticks intact.
For ultimate crispiness, don’t crowd your baking sheet or pan. Also, make sure your pork rinds are crushed finely. Big chunks won’t stick well and might just fall off during baking.
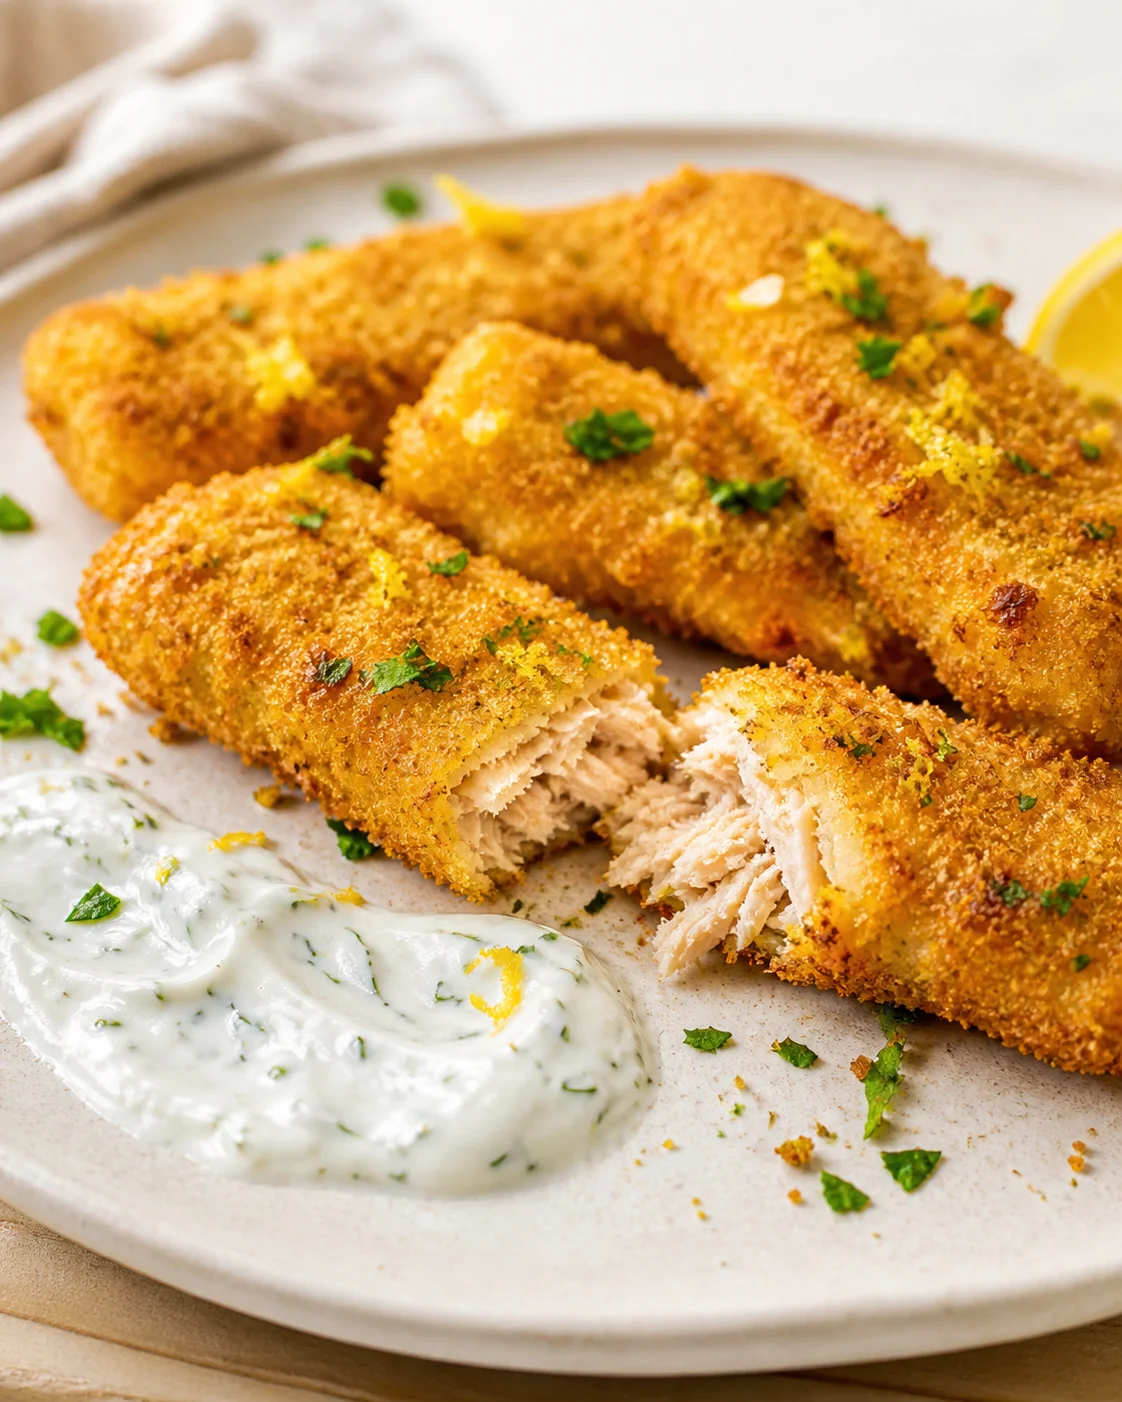
Since these tuna sticks are super crispy and flavorful, I love serving them with a trio of dipping sauces—tartar, ranch, or a spicy sriracha mayo are all winners. To round out the meal, a fresh side salad tossed with lemon vinaigrette balances the richness nicely. Roasted veggies like broccoli or asparagus also make great sides, or add an easy garlic mushroom rice pilaf to bulk it up. If you’re hosting a casual party or appetizer spread, pair these sticks with crunchy pickle spears, celery, and carrot sticks and a warm stuffed mushroom dip—the mix of warm and crispy with cool and crisp is always a crowd-pleaser.
Serve these tuna sticks with classic dips like tartar sauce, ranch, or spicy mayo. Pair them with a crisp side salad dressed in lemon vinaigrette to cut through the richness. Roasted veggies such as broccoli or asparagus complement the meal nicely. For snack or party options, serve with fresh veggie sticks and pickles for a balanced, crunchy combo.
Flavor Variations and Substitutions
This recipe is super flexible, so you can tweak it based on what you have handy in your pantry or fridge:
- Canned tuna: Any brand or type works here. You can even swap in canned salmon or canned chicken for a new spin—just make sure to drain thoroughly.
- Cheddar cheese: Switch cheddar for mozzarella, pepper jack for a little heat, or a Mexican cheese blend. For a melty, tuna melt-style spin, check out Crispy Tuna Melt Patties. Avoid soft cheeses like brie or cream cheese—they don’t give the right firm texture.
- Pork rinds: Not a fan of pork rinds? Crushed nuts, panko breadcrumbs, or even crushed cheese crackers work well to add that crunch. Remember, breadcrumbs add carbs if you’re watching your intake.
- Egg: The egg is key for binding, but for an egg-free version, try 2 tablespoons of mayo instead. It helps hold everything together and adds moisture.
- Seasonings: Endless seasoning combos here—Old Bay for that classic seafood vibe, Italian seasoning, or even taco seasoning for a fun twist. Just tweak salt based on your seasoning choice. For an Asian-inspired flavor profile, this Asian Tuna Cakes recipe shows how to layer soy, ginger, and scallion.
Want to shake things up? Swap tuna for canned salmon or chicken for a different flavor profile. Try different cheeses like pepper jack for a little spice or mozzarella for a mild creamy texture. Change the coating by using panko, crushed nuts, or cheese crackers if you prefer. Play with seasonings—Old Bay, Italian herbs, or taco seasoning all work wonderfully to suit your family’s taste.
Storage, Freezing, and Reheating
Keep Fresh: These tuna fish sticks are best eaten fresh, but if you have leftovers, store them in an airtight container in the fridge for up to 3 days. I like to tuck a paper towel inside the container to help keep them crispy.
Freeze: Want to prep ahead? These freeze beautifully! Let them cool completely, then layer them with parchment paper in a freezer-safe container or bag. They last about 2 months frozen.
Crisp Up: To reheat and keep them crispy, pop your leftover sticks into an air fryer at 350°F for 3-4 minutes or bake at 375°F for 5-7 minutes. If reheating from frozen, just add a couple minutes more. For more oven-crisping cues, see our crispy baked cod that’s perfectly golden and flaky.
Preparation Time 10-15 minutes Cooking Time 20 minutes Total Time 30-35 minutes Level of Difficulty Easy
After cooking, store any leftover tuna fish sticks in an airtight container in the fridge for up to three days. Lay a paper towel inside to keep them from getting soggy and to preserve that satisfying crispy crust. For best texture, reheat using an oven or air fryer to bring back the crunch.
These fish sticks are great for meal prep! Mix and shape the sticks, then freeze them uncooked on a parchment-lined tray. Once frozen, transfer them to a freezer bag for up to two months. When you’re ready, bake straight from the freezer—just add a few extra minutes to the baking time for perfectly cooked sticks. If you want another make-ahead tuna dinner, try this high-protein tuna casserole with Greek yogurt sauce.
Questions About Ingredients and Prep
Choosing canned tuna for your fish sticks? Chunk light tuna is a budget-friendly favorite and works great here, while solid white albacore offers a milder taste and firmer texture. For this recipe, pick tuna packed in water (not oil) since we’re adding our own binders. The key step is absolutely draining the tuna well—no one wants soggy sticks! If you’re worried about mercury, skipjack tuna (usually labeled as chunk light) typically has less mercury than albacore and is a safer bet for families with kids.
- Can I use tuna packed in oil? It’s best to use tuna packed in water for this recipe because it mixes better with the binders and prevents greasiness, but if you do use oil-packed tuna, be sure to drain it very well.
- How do I prevent the fish sticks from falling apart? Drain the tuna thoroughly, chill the mixture before shaping, and avoid overcrowding in the oven. These steps help the sticks hold their shape and get crispy.
- Can I bake these in an air fryer? Absolutely! Preheat your air fryer to 375°F and cook the sticks in a single layer for about 8-10 minutes, flipping halfway through.
- Are these suitable for kids? Yes! These fish sticks are mild in flavor, cheesy, and crispy—usually a hit with kids. Pair with familiar dips to make them even more appealing. If you’ve got extra cans to use, this Matthew McConaughey viral tuna salad makes a quick, no-cook lunch option.
- Can I make these gluten-free? Yes! Using crushed pork rinds or gluten-free panko breadcrumbs keeps them gluten-free and delicious.
Crispy, cheesy baked fish sticks made from canned tuna, shredded cheddar, egg, and crushed pork rinds for a low-carb, kid-friendly, budget-conscious meal ready in about 30 minutes.
- Prep Time: 10-15 minutes
- Cook Time: 20 minutes
- Total Time: 30-35 minutes
- Yield: Approximately 6-8 sticks (servings depend on portion size) 1x
- Category: Main Course
Ingredients
- 1 can tuna, very well drained
- 1 cup shredded cheddar cheese (e.g., sharp cheddar)
- 1 large egg
- 1/2 cup crushed pork rinds (finely crushed to breadcrumb consistency)
- Garlic powder, to taste
- Salt, to taste
- Freshly ground black pepper, to taste
- Paprika or cayenne pepper, to taste
Instructions
- Preheat the oven to 400°F (200°C).
- Drain the canned tuna very well and pat dry with paper towels.
- Crush pork rinds finely to a breadcrumb-like consistency.
- In a mixing bowl, combine the well-drained tuna, shredded cheddar, egg, crushed pork rinds, garlic powder, salt, black pepper, and paprika or cayenne pepper.
- Mix until a sticky mixture forms that holds together.
- Chill the mixture in the refrigerator for at least 15 minutes to firm up the mixture.
- Shape the chilled mixture into uniform sticks using your hands.
- Line a baking sheet with parchment paper and arrange the sticks spaced evenly so they do not touch.
- Bake at 400°F for about 20 minutes, or until golden brown and firm when gently pressed.
- Remove from the oven and let the sticks rest a few minutes before serving.
Notes
Ensure tuna is thoroughly drained and patted dry to avoid soggy sticks., Chilling the mixture helps it hold shape and reduces crumbliness., Do not overcrowd sticks on the baking sheet to ensure even crispiness., Crush pork rinds finely to mimic breadcrumbs for best adherence., For extra crispiness when reheating, use an air fryer at 350°F for 3-4 minutes or bake at 375°F for 5-7 minutes., These sticks can be frozen before baking for up to 2 months; bake from frozen adding a few extra minutes., Substitute canned salmon or chicken for tuna, shredded mozzarella or pepper jack for cheese, and panko or crushed nuts for pork rinds (note carb impact)., For egg-free binding, substitute 2 tablespoons mayonnaise., Seasonings can be varied: Old Bay, Italian seasoning, taco seasoning, etc.
Nutrition
- Serving Size: 1-2 sticks
- Calories: Approximately 150-200 calories per serving (estimate depending on exact ingredients and serving size)
- Fat: 10-15 grams per serving (from cheese, egg, tuna, and pork rinds)
- Carbohydrates: 2-5 grams per serving (low-carb due to pork rinds coating)
- Protein: 10-15 grams per serving (estimate)